
Rust Admin Commands and Console Commands Explained
A practical Rust command reference grouped by the jobs admins actually do: moderating players, investigating griefing, managing the world and running restarts, plus why a command fails and how to make changes stick.
quit closes your game; sv quit saves and shuts down the server. A lot of “does nothing” reports are really the wrong console target.
ownerid gives auth level 2 and full server control. moderatorid gives auth level 1, which is enough for most in-game moderation but not server-critical work.
Use the 17-digit ID starting with 7656. banid works even if the player is offline, which is ideal after you review evidence.
Live convars vanish on restart unless they are in server.cfg or saved with server.writecfg. Startup-only settings must be set before boot.
Where Rust commands actually run
Before you worry about syntax, check the command’s home. Rust splits commands into client commands, admin commands, and server-console commands. On PC, your in-game F1 console can run client commands directly; an admin can also send some server-console commands from F1 by adding the sv prefix. If you are on Linux, the local console is not interactive, so you need RCON to send commands. Rust Console Edition on PlayStation or Xbox does not have the PC F1 console, so this command set does not apply there.
The matrix below is the quickest way to stop typing good commands into the wrong place.
| Command type | F1 console in game | Server console or RCON |
|---|---|---|
| Client commands: ping, kill, perf | Yes | No |
| Moderation: status, kick, banid, mute | Yes | Yes |
| In-world tools: teleport, noclip, ent who | Yes | No |
| Server-side say and quit | Partly | Yes |
| Startup settings: server.port, rcon.password | No | No |
The three places that matter
- F1 client console: your own client commands and some admin tools while you are logged into the server.
- F1 with
svprefix: sends certain server-console commands through your client, but only if your auth level allows it. - Server console or RCON: full server-side control, used for startup checks, remote administration, saves, restarts, and commands that are not meant to run from a player client.
Meaning changes matter. quit closes your game client. sv quit saves and closes the server. The command text is similar, but the target is completely different.
Find the exact command name first
Rust command names move around with updates, and some host panels label things differently. Use find before assuming the command is gone.
find ban
find weather
find decay
If you are checking a convar rather than changing it, type the name on its own to read the current value.
server.saveinterval
decay.scale
server.idlekick
Get admin access without overcomplicating it
If you do not have auth, most of the guide below will either fail silently or return a permission error. Keep setup simple: add the user, reconnect, then confirm the server has granted the level.
users
ownerid 76561198123456789 "YourName"
moderatorid 76561198123456780 "HelperName"
users in the server console lists connected players with their Steam64 IDs. After adding yourself or another admin, reconnect to the server. On reconnect, the console or log should show has auth level. You do not need to save afterwards; that part is automatic now.
If the server is shut down, you can also add lines directly to users.cfg in server/<identity>/cfg/. Only edit that file while the server is stopped.
ownerid 76561198123456789 "YourName" ""
moderatorid 76561198123456780 "HelperName" ""
- Owner, auth level 2: highest level, can add another owner, and can send RCON-level commands from F1.
- Moderator, auth level 1: enough for most in-game moderation tools, but not the server-critical side.
To remove access later, use removeowner 7656XXXXXXXXXXXXX or removemoderator 7656XXXXXXXXXXXXX.
Moderate players: identify, verify, act
Good moderation is a pipeline, not a single command. First identify the correct player by Steam64 ID, then gather enough context to act, then choose the lightest command that fixes the problem. That protects legitimate players, and it protects you from banning the wrong person because two names looked similar in chat.
This workflow is the one to follow when a cheater report lands mid-raid or just before wipe.
Moderation commands that matter day to day
| Command | What it does | When to use it |
|---|---|---|
status |
Lists players with Steam64 ID, name, ping, time played and IP. | Best first step when you need positive identification and more context than a name alone. |
players / users |
Shows connected players and IDs; users is also useful when setting admin access. |
Use when you only need the ID quickly. |
kick <Steam64ID|name> <reason> |
Disconnects the player, but they can rejoin straight away. | Use for warnings, desync cases, voice abuse resets, or clearing a stuck connection without a ban. |
ban <Steam64ID> <name> <reason> <duration> |
Bans a player, with a name you will recognise later, a reason and an optional expiry. | Use after you have confirmed the target and want the reason recorded with the ban. |
banid <Steam64ID> <name> <reason> <duration> |
Bans by ID even if the player is offline. | Best choice after reviewing logs or evidence later. Safer than names and not dependent on them being online. |
banlistex / unban <Steam64ID> |
Shows bans with names and reasons; removes a ban by ID. | Use to verify what happened before reversing staff action. |
mute / unmute <Steam64ID|name> |
As admin, mutes server-wide. Without admin, it only affects your client. | Use for text or voice disruption where a ban would be excessive. |
killplayer <Steam64ID|name> |
Kills the target character. | Use sparingly for bug resolution or to break an exploit situation, not as routine punishment. |
kickall "<reason>" |
Disconnects everybody. | Useful just before an emergency restart or after a bad plugin push, but it is disruptive. |
skipqueue <Steam64ID> |
Lets a specific user bypass queue restrictions. | Good for staff, builders, testers, or access to a hidden maintenance server. |
A practical cheater-report workflow
- Identify the player by Steam64 ID. Use
statusorplayers. IDs do not change between name swaps. - Check recent combat context.
combatlog 7656XXXXXXXXXXXXXshows recent damage dealt and received. It helps you separate “he two-shot me” from something that actually breaks expected behaviour. - Observe before acting. Use
spectateor the teleport tools to watch movement and interactions yourself. A few minutes of watching beats an argument in chat, and it is what stops false bans. - Ban with a reason. A reason on the record helps other staff later. Duration is optional and uses formats like
7dor1M7d5m(one month, seven days and five minutes). - Log the action outside the live moment. Keep the ID, reason, time and evidence note in your staff record so an appeal is easy to review.
status
combatlog 76561198123456789
banid 76561198123456789 "SuspectName" "aimbot evidence" 7d
banlistex
Investigate griefing, ownership disputes and bugged entities
Most grief and “my base is broken” tickets come down to one of four things: who placed it, who is authorised, where the player actually is, or which exact entity you are looking at. These commands answer those questions directly.
Player position, movement and observation
printpos: prints your coordinates. Withsvand a Steam64 ID, it can be used for another player. Useful when you need a precise location for follow-up.teleport,teleport2me,teleport2marker,teleport2owneditem,teleportany,teleportlos,teleportpos: these are your movement toolkit. Arriving visibly in the middle of a fight changes it, so pair them withnoclip,god trueandspectatewhere appropriate.spectate/debugcamera: observation tools for suspicious movement, clipping and grief reports. Better than reacting from chat alone.
Entity checks and repair work
ent who: shows the Steam64 ID of who placed the entity you are looking at. That is the quickest answer in many grief cases.ent auth: shows who is authorised on the tool cupboard you are looking at. Useful when a clan claims “only our builder had access”.ent lock/ent unlock: works on code locks and key locks. Good for recovery after bugs or admin-approved restoration.ent kill: destroys the entity you are looking at. Use it for a single bad lock, stuck deployable or obviously broken object. It changes the world state immediately and will be saved on the next save.debug.lookingat: prints the prefab path of what you are looking at. This is how you verify the exact entity before using broader tools.del <prefab path>: removes every instance of that prefab on the whole server. This is powerful and dangerous. It is for large-scale clean-up when you are certain of the prefab path, not for guessing.resetstate <Steam64ID>: resets a player state such as hostile status at safe zones. Good for bug resolution when the status is stuck.
ent who
ent auth
debug.lookingat
ent kill
resetstate 76561198123456789
The reason to prefer narrow commands first is simple: a targeted fix changes one entity or one player state. Broad commands like del touch the whole map and can create more staff work than the original problem if you use them too early.
Manage the world without surprising the whole server
Some commands only affect your view; others change the live world for everybody. That distinction matters more than the syntax. If you use a world command during a live evening, players will feel it immediately.
admintime 0-24: changes time of day for you only. Use this when you need daylight to inspect a structure or screenshot a bug without changing everyone else’s session.admintime -1resets it.env.time 0-24: changes time for the whole server. Good for events, bad if you accidentally force daylight during normal play.env.progresstime true/false: starts or stops world time progression. Freezing time is useful for controlled maintenance or testing, but confusing if left disabled.weather.load <type>/weather.report: applies or checks weather state. Weather shifts are global. Some weather chance variables cannot be set at startup and must be changed live after the server is running.decay.scale: adjusts decay globally. Lower decay sounds attractive, but less decay means more player-built entities survive longer, which increases what the server has to keep in memory and write to disk over time.heli.call,heli.calltome,bradley.quickrespawn: force AI events. Fine for events or testing, but repeated use adds active entities and AI work to the server’s main thread.hackablelockedcrate.requiredhackseconds: changes crate hack duration. This alters server behaviour for everyone, but it is mostly a rules decision rather than a performance one.inventory.give/inventory.giveto: adds items. Useful for compensation or testing. It does not fix the underlying cause of item loss, so do the investigation first when possible.spawn <entity>: spawns entities. Good for testing, risky on live servers if you forget to clean up, because every extra entity becomes something the server has to track and save.
admintime 12
env.time 12
env.progresstime false
weather.report
decay.scale 1
Run the server: announcements, saves, restarts and wipe-day checks
This is the operational side: keep players informed, save before risky work, and use restart tools that warn people instead of dropping them cold. The commands below are the ones you will reach for on laggy evenings and wipe days.
say/sv say: broadcast a message in chat. From server console or RCON usesay; from F1 usesv say.server.save: forces a save now. Use this before shutdowns or after important admin world edits so the disk state catches up.server.saveinterval: reads or changes the save interval. The default is600seconds. Shorter intervals reduce rollback risk but increase disk activity and small save hitches.restart <seconds> "<message>": schedules a restart with countdown warnings. With no arguments, it uses300seconds.quit/sv quit: server shutdown. Remember the difference: plainquitexits your client;sv quitsaves and closes the server.serverinfo,version,wipetimer.printwipe: quick checks for server state, build version and wipe timing.server.fps: the server frame rate. This is what players feel as server lag. Low server FPS points to the server thread or world load, not a single player’s graphics settings.server.idlekick: reads or sets idle kick time. Default is30minutes;0disables it.
sv say "Restart in 10 minutes for maintenance"
restart 600 "Restart in 10 minutes for maintenance"
server.save
sv say "Saving complete, restart shortly"
sv quit
Use restart countdowns because they give players time to get somewhere safe, which cuts complaints from people caught mid-fight or mid-move. A forced quit without warning is faster for you, but worse for everyone else.
Make changes stick: live convars, config files and startup-only settings
If a setting works now and disappears after reboot, the problem is usually not the value. It is the setting lifecycle. Think of Rust settings in three buckets: live-only right now, saveable live changes, and startup-only values that the server only reads before it launches.
The cards below show where each kind of setting lives and how long it lasts.
What persists, and where
- Live console change: immediate, but temporary unless saved.
server.writecfg: writes saveable convars tocfg/serverauto.cfg, and also updatesusers.cfgandbans.cfg.serverauto.cfgload order: read at startup beforeserver.cfg.server.cfg: read at startup and never written by the server. If the same line exists in both files,server.cfgwins because it loads later.
decay.scale 0.5
server.writecfg
That means you should pick a clear habit. Either keep your permanent settings in server.cfg as the source of truth, or save emergency live edits and then copy the ones you want to keep into server.cfg later. If you mix both without a plan, you end up chasing overrides.
Startup-only settings
These must be set on the startup command line or in your host’s startup settings, not as live commands: server.port, server.queryport, server.identity, server.seed, server.worldsize, server.level, rcon.port, rcon.password and rcon.web.
One more catch: some weather chance settings cannot be applied at startup and must be set after the server is already running, through the console or RCON. If a weather variable looks correct in a file but never takes effect, that is the first thing to suspect.
Plugin framework commands are separate from Rust itself
If a command starts with a slash in chat, such as /tp or /kit, it is not a built-in Rust command. It comes from your mod framework or a specific plugin. Keep that separate in your head or you will spend ages troubleshooting the wrong layer. If you need the framework side, see how to install mods on a Rust server.
| Task | Oxide | Carbon |
|---|---|---|
| Framework version | oxide.version or o.version |
c.version |
| List plugins | oxide.plugins |
c.plugins |
| Reload plugin | oxide.reload <name> or o.reload <name> |
c.reload <name> |
| Grant permission | oxide.grant user|group |
c.grant |
| Revoke permission | oxide.revoke |
c.revoke |
Also note that typing a Carbon permission command on its own prints its syntax, which is useful when you remember the verb but not the full argument order.
When a command does nothing: symptoms, causes and first fixes
Most dead commands are not broken commands. They are valid commands sent to the wrong target, by the wrong auth level, or in the wrong persistence layer.
| Symptom | Likely cause | First fix |
|---|---|---|
| “Command not found” or nothing obvious happens | Wrong console, wrong prefix, typo, or the command name changed with an update. | Use find <text>. Then retry in the correct place: F1, sv from F1, or server console/RCON. |
| “You don’t have permission” | No auth, wrong auth level, or you did not reconnect after being added. | Check users, confirm ownerid or moderatorid, reconnect, then look for has auth level. |
| A setting worked, then vanished after restart | You changed a live convar but never saved it, or you tried to change a startup-only setting live. | Put the permanent value in server.cfg or save with server.writecfg. Move startup-only values to startup settings. |
| You banned the wrong player | You targeted a name instead of a Steam64 ID. | Use the 17-digit Steam64 ID from status or players, then prefer banid. |
| A server command fails from F1 | It is server-console-only, or you forgot the sv prefix. |
As an admin, add sv in front. Otherwise run it from RCON or the host’s web console. |
| RCON will not connect | Wrong rcon.port or rcon.password, the TCP port is not open, or your client expects web RCON while rcon.web is off. |
Check the startup settings, then restart: RCON settings are only read at boot. |
| Players can still join after a ban | You used kick instead of a ban, or your shared ban API is failing and the failure mode allows joins. Existing players are not kicked when a centralised ban is added there. |
Check the local ban list with banlistex, confirm you used the correct ID, and review your shared-ban endpoint settings if you use them. |
| Players say the server is lagging | Low server.fps, too many active entities or events, or general world load rather than a single client issue. |
Check server.fps first, stop unnecessary spawned events, save, and restart cleanly if needed. |
Handle it yourself or get help?
Not every issue means you need a bigger plan or a support ticket. The trick is knowing what is an admin workflow problem and what is a platform or capacity problem.
| Situation | What you can do now | When to escalate or upgrade |
|---|---|---|
| Routine moderation, reports, mutes and bans | Use IDs, investigate with combatlog, spectate and teleport tools, then act with the lightest command that fits. |
Escalate only if you need plugin-based evidence, shared bans, or a more formal appeal workflow. |
| Lag complaints during busy periods | Check server.fps, clear unnecessary spawned entities, avoid repeated AI event spawns, save, and restart cleanly. |
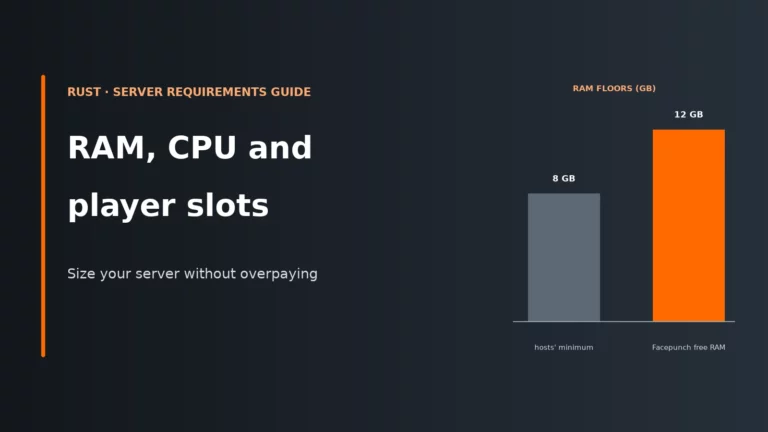
If low server FPS is a pattern rather than a one-off, compare the workload against our Rust server requirements guide. |
| Ports, map seed, world size or RCON settings not applying | Move them to startup settings; they are not live convars. | Ask the host or your infrastructure admin if the panel startup layer is overriding your files. |
| RCON exposure, weak passwords or admin account concerns | Rotate credentials and review who has owner access. | Use our game server security guide if you need a full hardening pass. |
| You can manage fine, but the tooling is awkward | Use the host web console, scheduled restarts and startup settings properly before changing anything else. | If the panel still slows you down, move to a provider with stronger Rust tooling and clearer console access. |
Many hosts include a proper web console, startup setting controls and scheduled restart tools in the panel, which makes routine Rust administration much less fiddly than living in raw command lines alone.
Compare the best Rust server hostsRust server FAQ
How do I make myself admin on a Rust server?
Use the server console or RCON and add yourself with ownerid 7656XXXXXXXXXXXXX "YourName" for full admin, or moderatorid 7656XXXXXXXXXXXXX "YourName" for moderator access. Then reconnect to the server so the auth level applies. You should see has auth level in the console or log when it works.
What is the difference between ownerid and moderatorid?
ownerid gives auth level 2, which is the highest server admin level. moderatorid gives auth level 1, which covers most in-game moderation tools but not the full server-critical command set. Only an owner can add another owner.
How do I ban a player who is offline in Rust?
Use banid with the player’s Steam64 ID, name, reason and optional duration. This works even when the player is not connected, which is why it is the safer command after you review evidence later. Prefer the ID over the name to avoid hitting the wrong account.
Why do my Rust server settings reset after a restart?
You probably changed a live convar and never saved it, or you changed a startup-only setting in the live console. Permanent values should go in server.cfg, or you can save supported live convars with server.writecfg. Startup-only values must be set before the server boots.
Can I use admin commands from the F1 console?
Yes, many admin commands work directly in F1 once you have the right auth level. Some server-console commands can also be sent from F1 with the sv prefix. If a command is truly server-console-only, run it through RCON or your host panel’s web console instead.
More Rust server help
Add plugins for extra admin tools, or check what your server needs before lag becomes a habit.
Commands, auth levels and defaults come from Facepunch’s Rust wiki, with the save and config behaviour taken from current host documentation (November 2026). Rust updates every month, so confirm a command on your build with find.