
How to Set Up a 7 Days to Die Overhaul Modpack Server
Darkness Falls, Ravenhearst, Rebirth and other big overhauls only run well when the game build, the pack version and the save stay matched. This is how to pin the branch, install cleanly, generate the world and update without losing it.
With overhauls, the newest stable build is often the wrong choice. Read the pack’s required 7 Days to Die version before you download anything.
Use a named Steam branch, not public. A plain app_update resets the server to the latest build and breaks the pack match.
Use a fresh server folder or validate and empty Mods first. Big packs ship as several folders, each directly under Mods with its own ModInfo.xml.
Back up the save, GeneratedWorlds and Mods, delete the old pack, install the new one, and update every player’s PC copy before anyone joins.
Why an overhaul server is a different job
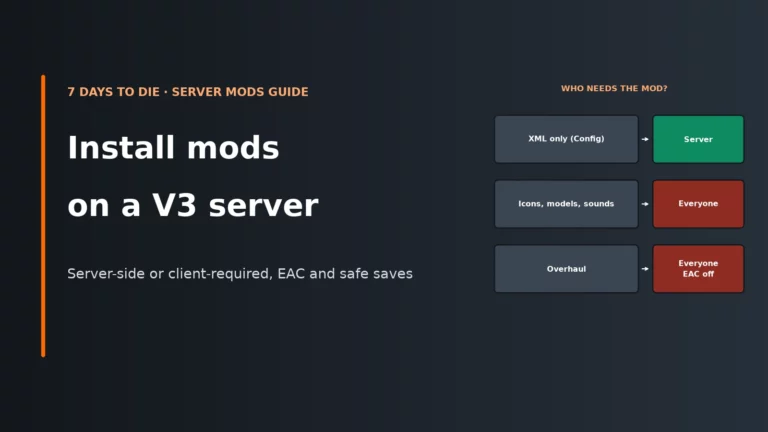
A normal modlet setup can be forgiving. A full overhaul is not. These packs combine XML changes, assets such as textures, sounds, UI and prefabs, and usually C# code loaded through the game’s Harmony loader. The important part for server admins is that the server does not send those assets or DLLs to players. It sends world state. That is why every player must install the exact same pack version locally, and why joining with “close enough” files usually fails later even if the server appears to start.
The three-way match is the whole job: game build, pack version and save. If the game build moves but the pack does not, the loader will still try to run old XML and code on a new executable. If the pack version moves but some players do not, clients and server disagree about assets and code. If the save stays while the pack removes or changes blocks, items or POIs, the world keeps references to content that no longer exists. That is when worlds start losing chunks of mod content or refuse to load cleanly.
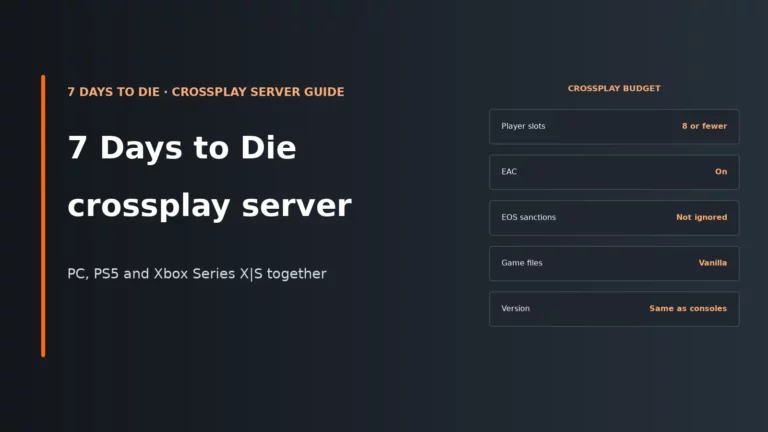
There are a few rules that follow from that. EAC must be off on the server and on every client. That also rules out crossplay with console players for this setup, because crossplay needs EAC on and consoles cannot join modded servers. Treat a new world as standard practice too: overhauls almost always need one.
| What drifts | What usually happens | How to prevent it |
|---|---|---|
| Game build moves (auto-update to public) | XML patches fail and pack code breaks on the new build | Pin a named branch, turn auto-update off |
| Pack version differs between server and players | Joins fail or parts of the pack seem missing | Everyone installs the same release before joining |
| Save stays while the pack changes | Mod blocks, items or POIs vanish from the world | Read the pack notes; start a new GameName when they ask for a fresh save |
Choose the game version first, then pin it
Step one is not downloading the overhaul. Step one is reading which game version the overhaul was built for. Darkness Falls is the clearest example: the current mod version 6.0.0.20 requires game version 1.4 and EAC disabled. So a Darkness Falls server belongs on the v1.4 branch, not on the current V3 public build. Other packs land on different branches: Ravenhearst 11 and Rebirth target 2.6, while War3zuk AIO and The Asylum have builds for 3.3. The newest stable build is usually wrong for an overhaul because pack authors trail the base game until their XML, assets and code are updated for it.
This matrix is the check to make before you upload a single file.
| Overhaul | Built for game version | Branch to select | EAC |
|---|---|---|---|
| Darkness Falls 6.0.0.20 | 1.4 | v1.4 | Off |
| Ravenhearst 11 | 2.6 | v2.6 | Off |
| Rebirth | 2.6 | v2.6 | Off |
| War3zuk AIO (3.3 build) | 3.3 | v3.3.0 | Off |
| The Asylum (3.3 build) | 3.3 | v3.3.0 | Off |
Steam exposes named branches for the dedicated server and they do not need a password. Public is only the default branch, and it has carried 3.4.0 since 26 October 2026. If you leave a server on public, the next Steam update can move it overnight and break the pack match.
| Branch to type | What it is | Typical overhaul use |
|---|---|---|
| public | Default branch, 3.4.0 since 26 Oct 2026 | Avoid for pinned overhaul servers |
| v3.4.0 | Version 3.4.0 Stable | Only for packs explicitly built for 3.4.0 |
| v3.3.0 | Version 3.3.0 Stable | War3zuk AIO and The Asylum builds for 3.3 |
| v3.2.0 | Version 3.2.0 Stable | Use only if a pack page names 3.2.0 |
| v2.6 | Version 2.6 Stable | Ravenhearst 11 and Rebirth |
| v1.4 | Version 1.4 Stable | Darkness Falls 6.0.0.20 |
| alpha21.2 | Older Alpha branch | Only for packs that still name that build |
| alpha20.7 | Older Alpha branch | Only for older pack releases built for it |
For a self-run server, pin the branch in SteamCMD every time you install or validate. The -beta part is the bit that matters. Without it, SteamCMD moves the install back to public.
steamcmd +force_install_dir /path/to/server +login anonymous +app_update 294420 -beta v1.4 validate +quit

steamcmd +force_install_dir /path/to/server +login anonymous +app_update 294420 validate +quit
The first command pins the branch. The second one is the trap. On rented servers, use the panel’s version selector or ask support to set the branch, then turn off auto-update. The trade-off is simple: a pinned branch means manual updates later, but it stops surprise breakage now. Players must match it too in Steam: right-click 7 Days to Die, open Properties, then Betas, and select the same branch.
Use a clean install and check the folder layout
Installing an overhaul over old files is where many messy problems start. A fresh server folder is best. If you cannot do that, validate the pinned branch and empty Mods before copying the pack. The reason is not cosmetic. The mod loader walks every mod folder it can see and applies every XML patch and DLL it finds. If old folders are left behind, removed files from a previous version still load, duplicate names collide, and patch rules fire against the wrong base files.
For folder basics, our guide to 7 Days to Die server mods covers the standard structure. For overhauls, the key extra point is that big packs ship as a stack of several folders, not one merged blob. Each pack folder must sit directly under Mods and each one must contain its own ModInfo.xml.
Mods/
  0_TFP_Harmony/
    ModInfo.xml
  PackCore/
    ModInfo.xml
  PackFramework/
    ModInfo.xml
  PackModlet_A/
    ModInfo.xml
  PackModlet_B/
    ModInfo.xml
If one folder is one level too deep, the game checks the outer folder, finds no ModInfo.xml, and ignores it. Leave the game’s own TFP folders alone, including 0_TFP_Harmony. Do not rename or “tidy up” the pack’s internal folder names either, because duplicate names and hard-coded patch targets matter.
The two Mods folders trap
7 Days to Die reads two Mods folders: the user data folder first, then the Mods folder in the install directory. On Windows that user path is %APPDATA%\7DaysToDie\Mods. On Linux it is ~/.local/share/7DaysToDie/Mods. A forgotten test copy in user data loads alongside the server install and can create duplicate-mod or wrong-version behaviour even when the install folder looks correct.
Some overhauls also ship their own serverconfig.xml. Darkness Falls install notes say to unzip the Mods folder, plus an icon and a serverconfig.xml, into the game folder. Do not blindly overwrite your live config with that file. Compare it with your server’s copy and bring across the pack-specific lines while keeping your own password, name and ports.
Build the config from the pinned branch, not from another version
This is where older branches catch people out. V3.0 moved about 30 gameplay properties into one SandboxCode property. A v1.4 or v2.6 server still uses separate lines for things such as difficulty, XP, day length, loot abundance and blood moon count, and it has no SandboxCode at all. So never paste a V3 serverconfig.xml into a v1.4 or v2.6 server. The reverse is just as bad in a quieter way: old properties are ignored on V3, which is why edits to them seem to do nothing.
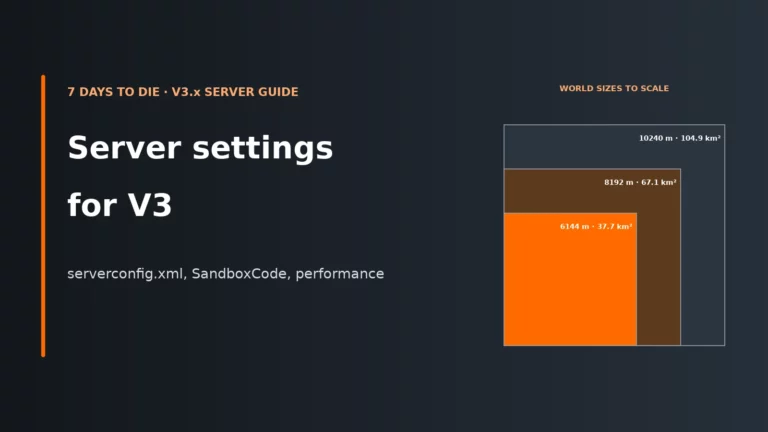
If your overhaul really targets V3, our V3 server settings guide explains the SandboxCode side. For older overhaul branches, always start from the serverconfig.xml installed by that branch, or from the pack’s own file if it ships one, and then copy your values across.
<property name="EACEnabled" value="false"/>
<property name="ServerAllowCrossplay" value="false"/>
<property name="GameWorld" value="RWG"/>
<property name="WorldGenSeed" value="YourSeed"/>
<property name="WorldGenSize" value="8192"/>
<property name="GameName" value="OverhaulWorld"/>
Those lines matter for specific reasons. EACEnabled false is required because overhaul DLLs rely on the mod loader; the trade-off is that all clients must launch without EAC too. ServerAllowCrossplay false belongs with that, because crossplay depends on EAC and modded servers are PC-only. GameWorld RWG with a seed and size tells the server to generate a random world using the pack’s own POIs and biome rules. Bigger worlds give more room but cost more CPU time, heap and disk during generation and more disk space afterwards. Officially supported world sizes are 6144 to 10240, in multiples of 2048.
GameName controls the save identity. Change the GameName and you create a new save; keep it the same and the server returns to the existing world with that name. That is useful both for testing a new pack release and for keeping an older save untouched. Set ServerMaxPlayerCount and ServerPassword in the same branch-matched file, then copy the file to your own name and launch with -configfile=yourconfig.xml so updates do not overwrite it. Remember that serverconfig.xml is read only at start, so restart after changes. Reinstalls and game updates can also reset config and switch EAC back on, so re-check those lines after maintenance.
First start: install first, then generate the world
Generate the world only after the overhaul is installed. Random world generation uses the pack’s prefabs, POIs and biome rules. If you generate a world before installing the pack, that world never receives the pack’s custom POIs and usually needs wiping and regenerating. That is why “we’ll add the overhaul later” is the wrong order for big packs.
The first boot takes much longer than vanilla because the server is doing two heavy jobs at once: loading a large stack of mod assets and code, then building an RWG map with the pack’s extra content. That work leans on the main thread CPU, heap and disk I/O. Do not restart halfway through generation because an interrupted run can leave a broken world. The right sign is not “the window still looks busy”; it is a finished generation and a clean log.
Search the log for these lines first.
Loaded Mod: <name>
Folder X does not contain a ModInfo.xml, ignoring.
Mod with same name (X) already loaded, ignoring
ModInfo.xml in legacy format. V2 required to load mod
XML patch for "items.xml" from mod "Name" did not apply.
“Loaded Mod” confirms the server saw a mod folder and accepted it. The other lines point to the usual overhaul failures: wrong folder depth, a second copy of the same mod in the other Mods path, an outdated legacy mod format, or XML patches that no longer match because the game build or pack files are wrong. Fix those before inviting players. It is much quicker to correct the install now than to discover later that the world generated without the pack’s POIs.
Get every player onto the same build
A rented or self-run overhaul server only works if the clients are in lock-step with it. Players need the same pack version, the same Steam beta branch, and EAC off when they launch. The easiest route for a whole group is the 7D2D Mod Launcher, because it installs packs like Darkness Falls and sets up a matching game copy for players. Manual installs work too, but they need more discipline because every player must copy the same files and choose the same beta branch in Steam.
- Install the exact same overhaul release on every PC.
- Set the same Steam beta branch as the server in the Betas tab.
- Launch without EAC.
- Only join after everyone has updated to the same pack revision.
If the game build differs, the client reports: Game Version Mismatch: you have '{0}' and server has '{1}'. If the build matches but the pack files do not, joins can still fail later or the game can behave as if parts of the mod are missing. The server cannot fix that for them because it is not distributing the assets or DLLs they lack.
Plan updates around the save, not around convenience
Overhaul updates are where good habits save worlds. The safe routine is always the same: read the pack notes first, confirm which game version the new release needs, stop the server, back up the live data, then replace files cleanly. Never let a public-branch overhaul server auto-update, because that updates the game first and asks questions later.
- Read the pack’s notes and check two things: the required game version and whether the update is save-compatible.
- Stop the server.
- Back up the save folder, GeneratedWorlds and the whole Mods folder.
- Delete the old pack folders.
- Install the new pack files.
- Set or re-check the branch.
- Start the server and read the log before opening it to players.
- Update every player’s PC copy to the same version before anyone joins.
The delete-then-install step matters because overwriting leaves removed files behind. Those leftover XMLs and DLLs keep loading and cause exactly the kind of “it used to work before the patch” errors that waste an evening. The cost is a little more upload time and bandwidth, but it avoids stale files contaminating the install. If the pack archive is large, use SFTP rather than a browser file manager.
What can and cannot move
Vanilla to overhaul is usually a no for serious packs. Even if a save opens, the world was generated without the pack’s POIs and biome rules, so it is not really an overhaul world. Overhaul to vanilla is worse: worlds that used mod-added blocks or items keep references to them, and removing the pack damages the save. Pack-to-pack or major-version jumps should be treated as fresh-save territory unless the author says otherwise. Some updates state it directly; one Asylum overhaul update, 2.5.3, required a brand-new save.
V3.0 also added a warning when loading a save from an older major version. If you need to preserve the old world while testing a risky update, use the GameName trick. Saves live under %APPDATA%\7DaysToDie\Saves\<GameWorld>\<GameName> on Windows and ~/.local/share/7DaysToDie/Saves on Linux, with GeneratedWorlds in the same user data area. Change GameName and the server creates a new save folder, leaving the old one untouched for rollback. If your server uses a custom UserDataFolder, that is the location you need to back up.
Hardware and host features that matter for overhaul packs
The official dedicated server baseline is minimum 8 GB RAM, recommended 16 GB, a quad-core 2.8 GHz minimum or 3.2 GHz recommended, and 20 GB disk. For overhaul packs, aim towards the recommended end. They add main-thread CPU work through extra code, heap use through more items, entities and POIs, and heavier disk and RAM use during first-time world generation.
That matters more than glossy panel extras. For an overhaul, the useful hosting features are plain ones: SFTP so you can upload large pack files reliably, a branch selector or support staff who can pin the server to the right build, and the ability to stop auto-update. Bigger RWG maps and more players add pressure in the places overhauls already stress, so version control and clean file access are often more important than chasing the latest public build.
If you are deciding between renting and self-running, our 7 Days to Die server hosting comparison is the place to weigh branch control and file access properly for overhaul use.
For overhaul packs, version control, SFTP access and update behaviour matter more than a flashy panel. Use the comparison to narrow down hosts that suit older branches and manual update routines.
Compare 7 Days to Die server hostsTroubleshooting: start with branch, then logs, then save
Most overhaul failures come from one of five places: wrong game branch, wrong pack version, EAC or crossplay left on, bad folder layout, or an old save/world being reused. Check them in that order. This flow is the quickest way to narrow it down.
| Symptom or log line | Likely cause | First fix |
|---|---|---|
Game Version Mismatch: you have '{0}' and server has '{1}' |
Server and client are on different game branches | Pin the server to the pack’s required branch and make players choose the same branch in Steam Betas |
Folder X does not contain a ModInfo.xml, ignoring. |
A pack folder is one level too deep or unpacked wrongly | Move each actual mod folder so it sits directly under Mods and contains its own ModInfo.xml |
Mod with same name (X) already loaded, ignoring |
The same mod exists twice, often across the user-data Mods folder and the install Mods folder | Check both Mods paths and remove the duplicate copy |
ModInfo.xml in legacy format. V2 required to load mod |
An outdated leftover mod or an old pack file is being loaded | Clean the install, delete old pack folders and reinstall the correct pack version |
XML patch for "items.xml" from mod "Name" did not apply. |
Wrong game build, mixed pack versions, or stale files from an older install | Re-check the required branch, then delete the old pack and reinstall cleanly |
If none of those appear but the server behaves like vanilla, suspect world order or config. Regenerate RWG after the pack is installed, check that EACEnabled is still false after any update or reinstall, and make sure you started the server with the intended config file. If the server starts but the world is wrong, confirm that you did not keep an old GameName by accident and point the server back to an earlier save.
7 Days to Die server FAQ
Can I run Darkness Falls on the latest 7 Days to Die version?
Not unless the pack author says that release is built for the latest game version. Darkness Falls 6.0.0.20 requires game version 1.4, so the server needs the v1.4 branch and EAC off. Running it on public or V3 just because those are newer is the usual way to break the install.
Do players need to install the overhaul to join my server?
Yes. Overhaul assets and code are not sent by the server, so every player needs the same pack version on their own PC. They also need the same Steam beta branch and must launch without EAC.
How do I keep my 7 Days to Die server on an older version?
Pin it to a named branch instead of leaving it on public. In SteamCMD that means using app_update 294420 -beta branchname validate, and on rented servers it means using the panel’s version selector or asking support, then turning auto-update off. Players must select the same branch in Steam Betas.
Can I add an overhaul to an existing world?
For big overhaul packs, treat that as no. A world generated before the pack was installed will lack the pack’s POIs and world rules, and existing saves can hold references that do not survive mod removal or major pack changes. Start a new world unless the pack author explicitly says otherwise.
How much RAM does a 7 Days to Die overhaul server need?
The official dedicated server requirement is minimum 8 GB RAM and recommended 16 GB. Overhauls push closer to the recommended end because they add code, items, entities and heavier world generation. Bigger RWG maps and more players increase that pressure further.
More 7 Days to Die server help
Set up the rest of your server, or compare hosts that give you branch control and SFTP.
Branch names reflect the 7 Days to Die dedicated server (Steam app 294420) as of 2 November 2026, with 3.4.0 on public. Pack version requirements change with every release, so always check the pack’s own page before you pin a branch. Host panels label version selectors differently, but the routine stays the same: pin the version, install cleanly, and back up before every pack update.